Introduction
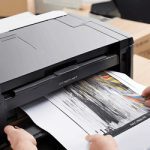
Connecting your Canon printer directly to your computer can seem daunting, but with the right steps, it can be a straightforward process. Whether you are using it for home or office purposes, having a direct connection ensures faster and more reliable printing. This guide will walk you through the necessary steps to connect your Canon printer to your computer directly.
Preparing Your Canon Printer
Unboxing and Setup
Start by unboxing your Canon printer and removing all packaging materials. Place the printer on a stable surface near your computer. Ensure you have all the necessary components, including the power cord, USB cable, and installation CD.
Powering On
Connect the power cord to the printer and plug it into a power outlet. Press the power button to turn on the printer. Wait for the printer to complete its initialization process before proceeding to the next step.
Connecting the Printer to Your Computer
Using a USB Cable
The most common method to connect your Canon printer to your computer is via a USB cable. Locate the USB port on your printer and connect one end of the USB cable to it. Connect the other end of the cable to an available USB port on your computer.
Installing Printer Drivers
Once the USB cable is connected, your computer should automatically detect the printer and prompt you to install the necessary drivers. If the drivers do not install automatically, you can use the installation CD that came with your printer or download the latest drivers from the Canon website.
Configuring Printer Settings
Accessing Printer Settings
After installing the drivers, you may need to configure the printer settings. Open the ‘Devices and Printers’ section on your computer, locate your Canon printer, and right-click to access the printer properties.
Setting as Default Printer
To ensure your Canon printer is the default printer, select ‘Set as default printer’ in the printer properties. This will make it the primary printer for all your printing tasks.
Troubleshooting Common Issues
Printer Not Detected
If your computer does not detect the printer, try using a different USB port or cable. Ensure that the printer is powered on and properly connected. Restart your computer and try again.
Driver Installation Problems
If you encounter issues during driver installation, ensure you are using the correct drivers for your printer model. Visit the Canon support website for the latest drivers and installation instructions.
Conclusion
Connecting your Canon printer directly to your computer is a simple process that involves a few straightforward steps. By following this guide, you can ensure a seamless connection and enjoy efficient printing. Remember to use the best compatible ink cartridges for Brother printers to maintain print quality and prolong the life of your printer.
