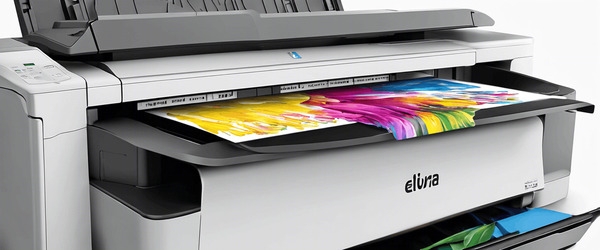
How to Connect a Canon G7070 Printer
The Canon G7070 is a versatile all-in-one printer that is known for its high-capacity ink tank system, efficient performance, and multiple connectivity options. If you’re looking to set up and connect your Canon G7070 printer, this guide will provide a detailed walkthrough of the process. Whether you want to connect it to a Wi-Fi network, a computer via USB, or use mobile printing options, the steps below will ensure smooth integration.
Step 1: Unbox and Prepare Your Printer
Before connecting your Canon G7070 to any device, ensure that it is properly unboxed, assembled, and set up:
- Remove all protective tape and packaging materials from the printer.
- Install the ink tanks by filling them with the provided Canon ink bottles.
- Load paper into the paper tray.
- Connect the printer to a power source and turn it on using the power button.
- Follow the on-screen setup instructions on the printer’s LCD panel to select language, date, and time.
Step 2: Connect the Printer to Wi-Fi
To use the wireless capabilities of the Canon G7070, you need to connect it to your Wi-Fi network. Follow these steps:
- Press the Menu button on the printer’s control panel.
- Navigate to LAN Settings using the arrow keys and press OK.
- Select Wireless LAN Setup and press OK.
- Choose the Easy Wireless Connect option for an automatic setup process.
- The printer will display a message prompting you to complete the setup on your computer or mobile device.
- Download and install the Canon PRINT Inkjet/SELPHY app on your smartphone or install the printer driver from Canon’s website on your computer.
- Follow the app or driver setup instructions to complete the Wi-Fi connection. The app will detect your printer and guide you through selecting your Wi-Fi network and entering the password.
Once connected, the printer’s LCD display will show a confirmation message indicating that it is successfully connected to Wi-Fi.
Step 3: Connect via USB
If you prefer a wired connection or don’t have access to a Wi-Fi network, you can connect the Canon G7070 directly to your computer using a USB cable:
- Use a USB cable to connect the printer to your computer.
- Turn on the printer.
- Download and install the necessary drivers from the official Canon website (https://www.canon.com). During installation, select USB Connection as your connection method.
- Follow the on-screen instructions to complete the setup process.
Once installed, your computer should recognize the printer, allowing you to print documents directly via USB.
Step 4: Mobile Printing Options
The Canon G7070 supports mobile printing, which allows you to print directly from smartphones or tablets. Here’s how you can set it up:
Using Canon PRINT Inkjet/SELPHY App
The Canon PRINT Inkjet/SELPHY app is available for both Android and iOS devices:
- Download the app from the Google Play Store or Apple App Store.
- Ensure that both your printer and mobile device are connected to the same Wi-Fi network.
- Open the app and follow its instructions to detect and pair with your printer.
- You can now print photos, documents, or scan directly from your mobile device using the app.
Using Apple AirPrint
For iOS users, Apple AirPrint provides a seamless way to print without installing additional drivers:
- Ensure that your iPhone or iPad is connected to the same Wi-Fi network as your Canon G7070 printer.
- Select the document or photo you wish to print and tap the Share button.
- Select Print, then choose your Canon G7070 from the list of available printers.
- Adjust print settings if necessary and tap Print.
Using Google Cloud Print
Although Google Cloud Print has been discontinued since December 2020, Canon G7070 supports other Android-compatible printing solutions like Mopria Print Service:
- Enable Mopria Print Service from your Android device’s settings or download it from Google Play Store.
- Ensure both devices are connected to the same network.
- Select the file you want to print, tap Print, and choose your Canon G7070 as the printer.
Step 5: Advanced Features and Troubleshooting
Once connected, you can explore additional features of the Canon G7070 such as duplex printing, scanning, or accessing maintenance functions through its control panel or software interface.
Scanning Documents
- Use the Canon IJ Scan Utility software on your computer or scan directly using the printer’s control panel.
- Select Scan, adjust settings (e.g., resolution, file format), and save scans to your desired location.
Troubleshooting Common Issues
If you encounter issues while connecting or using your printer:
- Printer not connecting to Wi-Fi: Ensure that you are entering the correct Wi-Fi password and that your router is functioning properly.
- Printer not detected by computer: Check if drivers are correctly installed and that all cables are securely connected if using USB.
- Poor print quality: Perform a nozzle check and cleaning cycle through maintenance settings to resolve any ink flow issues.
- Error messages: Refer to the user manual or visit Canon’s support website for specific error codes and solutions.
Conclusion
Connecting a Canon G7070 printer is straightforward once you follow these step-by-step instructions for various connectivity options like Wi-Fi, USB, and mobile printing solutions. Whether for home or business use, this multifunctional device offers reliable performance once properly set up. For further assistance, consult Canon’s customer support or official documentation tailored to your specific needs.


